Gingerbread Man and Woman Crochet Pattern
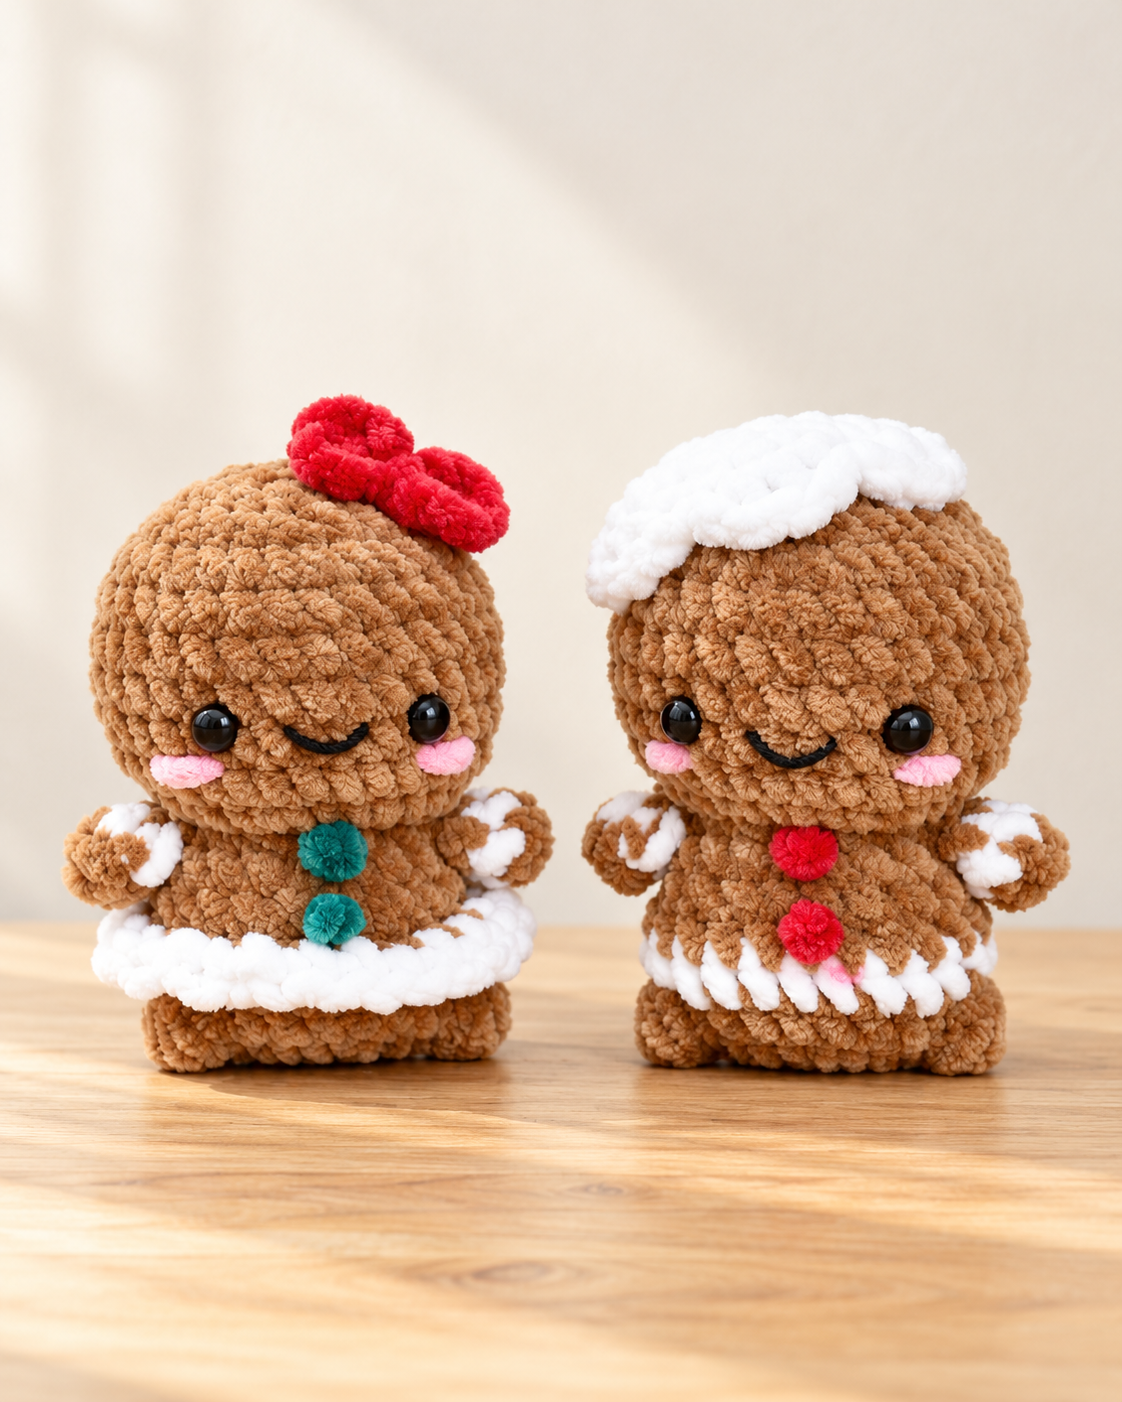
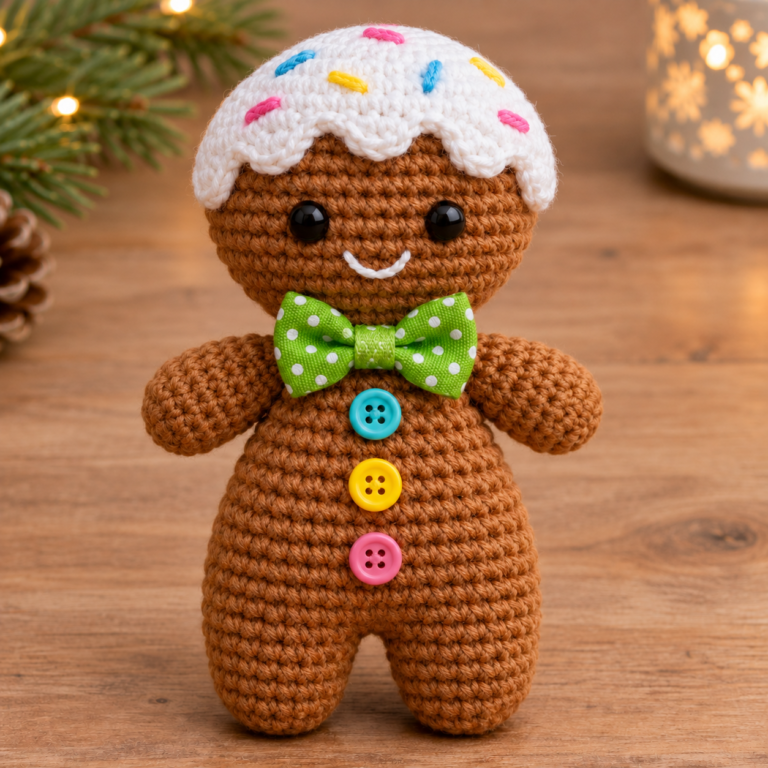
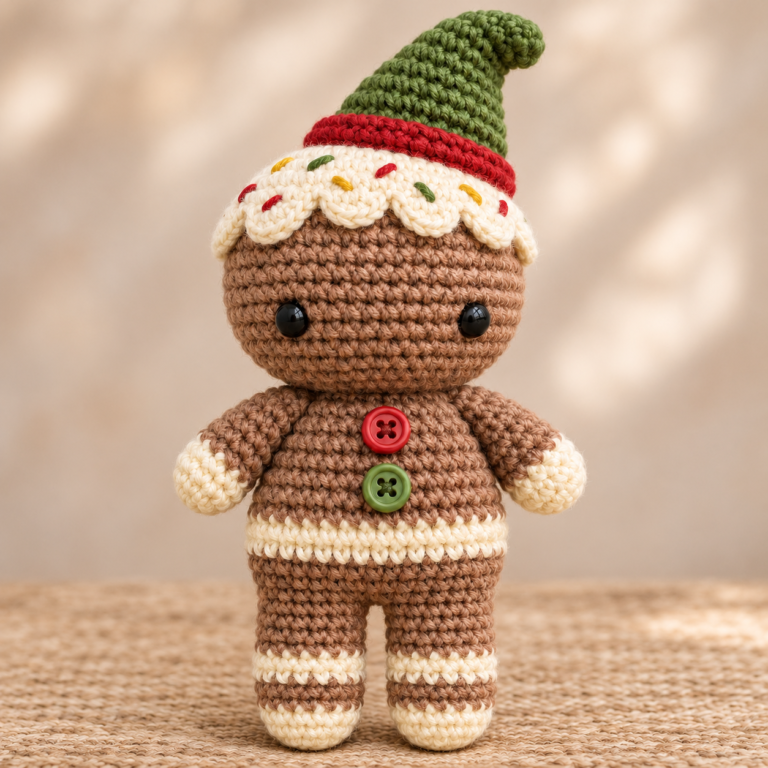
Bring a little handmade sweetness to your Christmas crochet with this gingerbread man and woman pair. Their soft brown yarn, white details, and embroidered smiles give them a cheerful holiday appearance.
The gingerbread man wears a white icing cap, while the gingerbread woman has a white frill and a red bow. Crochet your favorite character or make both as a matching pair.
This pattern uses US crochet terminology and is labeled beginner. The stated finished height is approximately 12 cm (4.7 inches) when made with Parfait Chunky yarn and a 4.5 mm hook.
The arms are attached while crocheting the body. Decorative pieces are sewn or glued into place as directed.
Materials and Supplies
Gingerbread Man
- Chunky Yarn : White, Brown, Pink, Red
- #2 Sport yarn : Black
- Crochet hook size 4.5 mm
- 9 mm Safety eyes
- Fiberfill
- Yarn needle / Scissors / Ball point pins
- Stitch marker
Gingerbread Woman
- Chunky Yarn : White, Brown, Pink, Green
- #2 Sport yarn : Black
- Crochet hook size 4.5 mm
- 9 mm Safety eyes
- Fiberfill
- Yarn needle / Scissors / Ball point pins
- Stitch marker
For the ribbon: Red yarn is also required.
Yarn
I use Parfait Chunky yarn, the similar yarns are
- HIMALAYA Dolphin Baby
- PAINTBOX YARNS Chenille
- KATIA Bambi etc…
You can check more similar yarns from Yarnsub
Crochet Abbreviations
| Abbreviation | Definition |
|---|---|
| sc | single crochet |
| inc | increase 2 sc in same st |
| dec | invisible decrease |
| slst | slip stitch |
| ch | chain |
| FLO | Front loop only |
| BLO | Back loop only |
| hdc | Half Double Crochet |
| dc | Double Crochet |
| BO | Bobble Stitch (5 double crochet Cluster) |
| MR | Magic Ring |
| […] | Total number of stitches |
| (…)x | Repeat n times |
Pattern Notes
This pattern is worked in continuous rounds unless otherwise stated.
Use a stitch marker or a piece of yarn to mark the start of each round.
Useful Techniques
Magic Ring for Chunky Yarn
If you stuck making magic ring with Chunky yarn, try this method.
- Make Ch 2
- Work specified number of sts in 2nd ch from hook
- Done
X-Shape Single Crochet Stitch
Iusually use X- Shaped Single chrochet. It can help make your tension even tighter and tend to look more defined and neater which is ideal for amigurumi.
- Insert the hook Yarn under to get the X-shaped stitch
- Pull yarn back through the stitch
- Yarn over
- Pull through the remaining
Invisible Decrease
There are no holes or bumps in sight compared with normal decrease (2sc together)
- Insert the hook underneath the front loop only
- Insert the hook into the front loop of the next stitch
- Yarn under and pull through the front two loops
- yarn over and pull through the emaining
FO (Finish Off) the Hole
You can get a beautiful finish using this method.
- Weave in only on the FLO through the last stitches.
- Weave in all last stiches from out to in.
- Pull the yarn tight to close up the hole.
Step-by-Step Crochet Instructions
Gingerbread Man
Arms × 2 — Brown, White
Start in Brown
Rnd 1 : [Brown] 6 sc in MR [6]
Change to White yarn
Rnd 2 : [White] 6 sc [6]
Do not stuff. Flatten the edges and, using Brown yarn, crochet sc in the next 3 sts throught both layers. Fasten off, weave the tail in. Make one more arm in the same way.
Head & Body — Brown, White
This part will be worked from bottom to top.
Start in Brown
Rnd 1 : [Brown] 8 sc in MR [8]
Rnd 2 : [Brown] 8 inc [16]
Rnd 3 : [Brown] ( sc, inc ) x 8 [24]
Rnd 4 : [Brown] 7 sc, BO-5dc, 8 sc, BO-5dc, 7 sc [24]
BO-5dc = Bobble Stitch (5 double crochet Cluster)
- Make 5 dc, but don’t complete the last pull through
- Pull through all loops at once to close the Bobble
- Insert the hook into the next stitch to make sc
Change to White yarn
Rnd 5 : [White] 24 sc [24]
Change to Brown yarn
Rnd 6 : [Brown] 24 sc [24]
Rnd 7 : [Brown] ( 4 sc, dec ) x 4 [20]
Rnd 8 : [Brown] 20 sc [20]
Rnd 9: 3 sc, dec, 3 sc with Arm, dec, 3 sc, dec, 3 sc with Arm, dec [16]
3 sc with Arm
Put the arm and the body together and crochet sc in next 3 st through both part.
- Insert the hook into the arm
- Insert the hook into the body as well
- sc through both pieces. Repeat this 3 times
Rnd 10 : FLO 16 inc [32]
Stuff the body firmly
Rnd 11 – 16 : 32 sc ( 6 rounds ) [32]
Attach 9mm safety eyes between Rnd 12 and Rnd 13, with 6 sts apart.
Start stuffing the head gradually.
Rnd 17 : ( 2 sc, dec ) x 8 [24]
Rnd 18 : ( sc, dec ) x 8 [16]
Rnd 19 : 8 dec [8]
Stuff the head firmly, fasten off, FO the hole, weave the tail in.
Icing — White
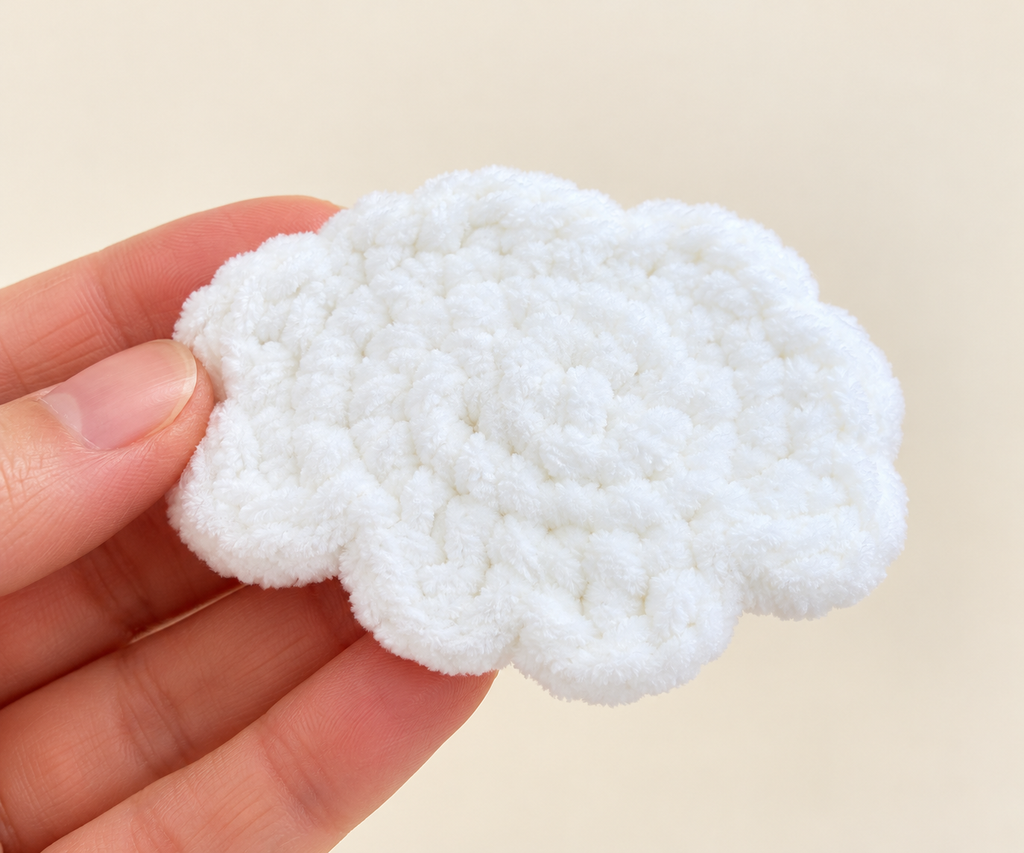
Start in White
Rnd 1 : 8 sc in MR [8]
Rnd 2 : 8 inc [16]
Rnd 3 : ( sc, inc ) x 8 [24]
Rnd 4 : [ skip one st, 4 dc in next st, skip one st, slst ] x 6
Slst, fasten off, weave the tail in.
Sew or glue it to the top of the head.
Button — Red
Start in Red
Make a ch 1 and tie the ends together.
Then sew or glue it to the center of the body.
Button quantity note: These directions describe one button. The pictured design has two; a repeat quantity is not specified.
Face Decoration
- Embroider pink cheeks 2 stitches wide under the eyes.
- Use black yarn to embroider the mouth at Rnd 12.
Gingerbread Woman
Arms × 2 — Brown, White
Start in Brown
Rnd 1 : [Brown] 6 sc in MR [6]
Change to White yarn
Rnd 2 : [White] 6 sc [6]
Do not stuff. Flatten the edges and, using Brown yarn, crochet sc in the next 3 sts throught both layers. Fasten off, weave the tail in. Make one more arm in the same way.
Head & Body — Brown, White
This part will be worked from bottom to top.
Start in Brown
Rnd 1 : [Brown] 8 sc in MR [8]
Rnd 2 : [Brown] 8 inc [16]
Rnd 3 : [Brown] ( sc, inc ) x 8 [24]
Rnd 4 : [Brown] 7 sc, BO-5dc, 8 sc, BO-5dc, 7 sc [24]
BO-5dc = Bobble Stitch (5 double crochet Cluster)
- Make 5 dc, but don’t complete the last pull through
- Pull through all loops at once to close the Bobble
- Insert the hook into the next stitch to make sc
Rnd 5 – 6 : [Brown] 24 sc ( 2 rounds ) [24]
Rnd 7 : [Brown] BLO ( 4 sc, dec ) x 4 [20]
Rnd 8 : [Brown] 20 sc [20]
Rnd 9: 3 sc, dec, 3 sc with Arm, dec, 3 sc, dec, 3 sc with Arm, dec [16]
3 sc with Arm
Put the arm and the body together and crochet sc in next 3 st through both part.
- Insert the hook into the arm
- Insert the hook into the body as well
- sc through both pieces. Repeat this 3 times
Rnd 10 : FLO 16 inc [32]
Stuff the body firmly.
Rnd 11 – 16 : 32 sc ( 6 rounds ) [32]
Attach 9 mm safety eyes between Rnd 12 and Rnd 13, with 6 sts apart.
Start stuffing the head gradually.
Rnd 17 : ( 2 sc, dec ) x 8 [24]
Rnd 18 : ( sc, dec ) x 8 [16]
Rnd 19 : 8 dec [8]
Stuff the head firmly, fasten off, FO the hole, weave the tail in.
Frill — White
Clarification needed: The setup below specifies white yarn, while the round says “[Brown].” The 24 repetitions and attachment loops also require confirmation. Check with the designer before working this section.
Start in White
With the feet facing upwards, attach the white yarn to the first stitch, working in the FLO of Rnd 7 of the body.
Rnd 1 : [Brown] ( sc, ch 1 ) x 24 [24]
Slst, Fasten off and weave in ends.
Button — Green
Start in Green
Make a ch 1 and tie the ends together.
Then sew or glue it to the center of the body.
Button quantity note: These directions describe one button. The pictured design has two; a repeat quantity is not specified.
Ribbon — Red
Start in Red
Make ch 4, start from 1st ch (4th ch from hook).
dc, ch 3, slst to the 1st ch, ch 3, dc into 1st ch, ch 3, slst into 1st ch
Pinch the center of the piece, wrap the yarn around a couple of times and fix with a knot at the back.
Ribbon sequence:
- ch 4,start from 1st ch
- dc
- ch 3
- slst into first ch
- ch 3
- dc into first ch
- ch 3
- slst into first ch
Face Decoration
- Embroider pink cheeks 2 stitches wide under the eyes.
- Use black yarn to embroider the mouth at Rnd 12.
Assembly and Finishing
The attachment and finishing instructions are included alongside each piece above. Follow them as you complete the arms, body, head, and decorations.
The woman’s frill and ribbon attachment require the clarifications noted in their respective sections.
Final Thoughts
With their embroidered smiles and festive details, this gingerbread pair brings a warm handmade touch to Christmas. Enjoy watching each character take shape, from the little bobble feet to the finishing decorations.