How to Crochet a Gingerbread Man: A Festive Amigurumi Pattern to Make at Home
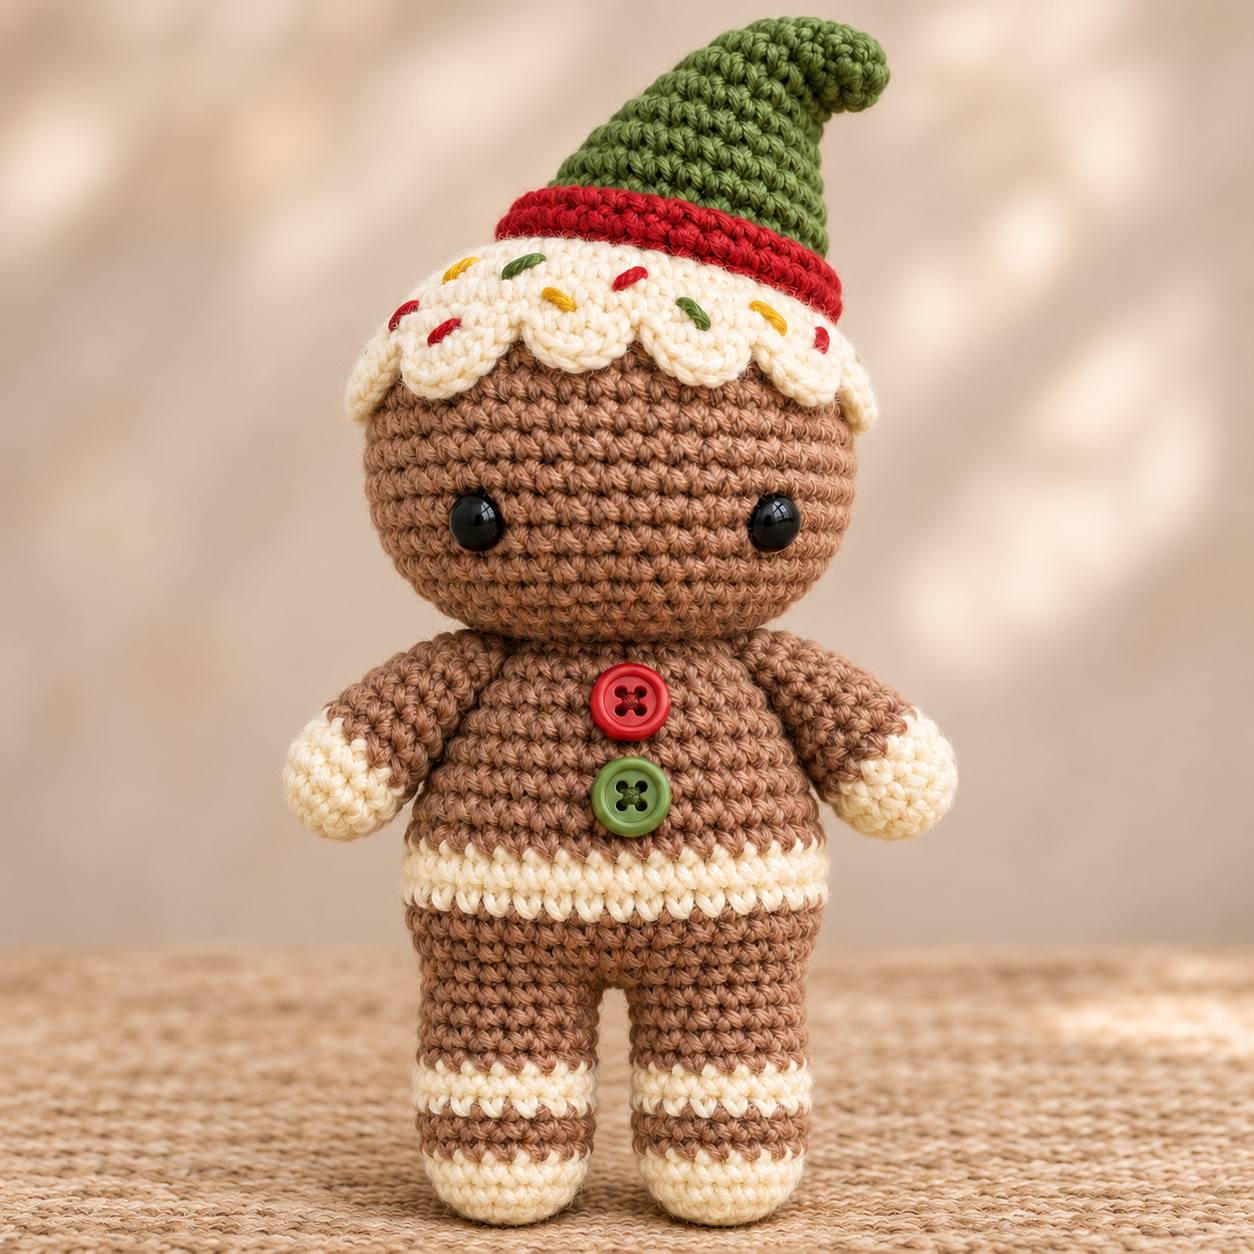
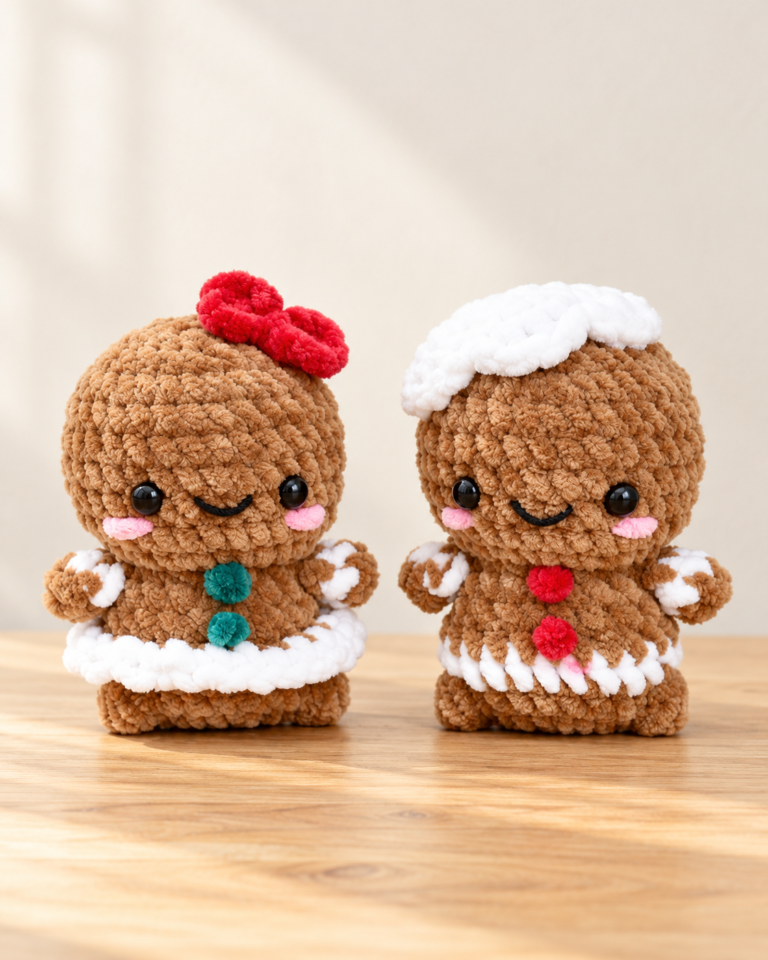
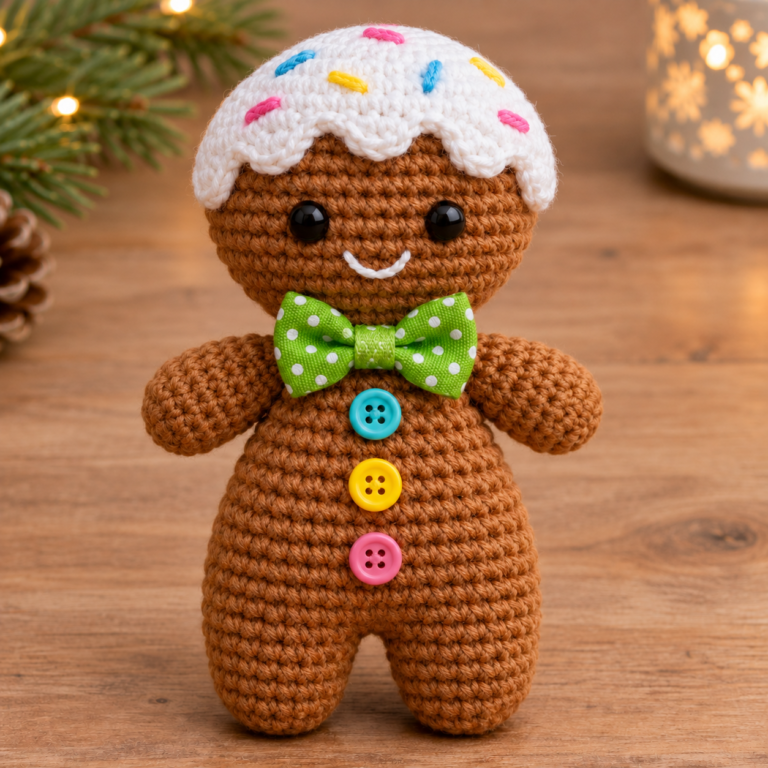
This cheerful gingerbread amigurumi brings a little handmade charm to the holiday season. With its cozy hat, icing detail, and colorful buttons, it makes a sweet decoration or a thoughtful gift for someone who loves crochet.
The project is described as advanced. The pattern is made in separate pieces, with the legs and body worked together. Follow each section in order, and use the finished-project photo as a visual guide while assembling your gingerbread friend.
Pattern Snapshot
| Skill level | Advanced, as described in the pattern |
| Finished size | Not specified |
| Hook size | Not specified |
| Yarn weight | Not specified |
| Terminology | Stitch names are given in the pattern glossary |
Materials and Supplies
The pattern does not give yarn brands, weights, or quantities. It mentions milky, brown, and red yarn. The finished-project photo also shows a green hat, but the written color instructions do not specify the green yarn.
- Yarn in the colors mentioned above
- Stuffing, for the parts the pattern instructs you to fill
- Eyes; type and size are not specified
- Two buttons, crocheted from the button instructions below
- A piece of plastic card for the hat base
Stitch Abbreviations
- MR: Magic ring
- sc: Single crochet
- inc: Increase
- dec: Decrease
- trc: Treble crochet
- st: Stitch
- dc: Double crochet
- hdc: Half double crochet
- sl-st: Slip stitch
- ch: Chain
- FLO: Crochet into front loops only
- BLO: Crochet into back loops only
- Multiple inc: Work the indicated number of increases into the same stitch, as described in the pattern glossary.
Step-by-Step Crochet Instructions
Legs and Body
Work the legs and body as one piece. Fill as you crochet.
- 1) 6 MR (begin crocheting the right leg in milky color)
- 2) 6 inc = 12
- 3) (3 sc, inc) × 3 = 15
- 4) 15 (change yarn to brown for the right leg)
- 5-10) 15 sc (for the left leg, change yarn to milky color in the 6th row and to brown in the 7th row)
- 11) 2 ch, attach the second leg and work 15 sc along it, then 2 sc along the chain of ch = 34
- 12) 34
- 13) 7 sc, inc, 16 sc, inc, 9 = 36
- 14) (5 sc, inc) × 6 = 42
- 15) 42 (yarn change)
- 16) 42
- 17-18) 42 (change yarn in the 17th row)
- 19) (12 sc, dec) × 3 = 39
- 20) (11 sc, dec) × 3 = 36
- 21) (10 sc, dec) × 3 = 33
- 22) (9 sc, dec) × 3 = 30
- 23) (8 sc, dec) × 3 = 27
- 24) (7 sc, dec) × 3 = 24
- 25) (2 sc, dec) × 6 = 18
- 27) 18 sc, sl-st, fasten the yarn and leave a tail for sewing.
Head
- 1) 6 MR
- 2) 6 inc = 12
- 3) (1 sc, inc) × 6 = 18
- 4) (2 sc, inc) × 6 = 24
- 5) (3 sc, inc) × 6 = 30
- 6) (4 sc, inc) × 6 = 36
- 7) (5 sc, inc) × 6 = 42
- 8) (6 sc, inc) × 6 = 48
- 9) (7 sc, inc) × 6 = 54
- 10-17) 54
- 18) (7 sc, dec) × 6 = 48
- 19) (6 sc, dec) × 6 = 42. Insert the eyes between rows 16 and 17, 11 stitches apart.
- 20) (5 sc, dec) × 6 = 36
- 21) (4 sc, dec) × 6 = 30
- 22) (3 sc, dec) × 6 = 24
- 21) (2 sc, dec) × 6 = 18. Fill with stuffing.
- 22) (1 sc, dec) × 6 = 12
- 23) 6 dec = 6
Tighten the opening and hide the yarn.
Arms
- 1) 6 MR (begin crocheting with milky color)
- 2) 6 inc = 12
- 3-5) 12 (change yarn to brown in the 4th row)
- 6) (4 sc, dec) × 2 = 10. Fill only here. Do not fill further.
- 7-8) 10
- 9) (3 sc, dec) × 2 = 8
- 10-11) 8
- 12) Fold the arm in half and crochet 4 sc. Fasten the yarn and leave a tail for sewing. The pattern says the arm can be crocheted into the body in the 25th row.
Hat
Stuff as you crochet.
- 1) 6 MR
- 2) 6 inc = 12
- 3) (1 sc, inc) × 6 = 18
- 4) (2 sc, inc) × 6 = 24
- 5) (3 sc, inc) × 6 = 30
- 6) 30 BLO
- 7-8) 30. The instructions say to cut a circle from a plastic card to fit the bottom of the hat and insert it into the base.
- 9) (8 sc, dec) × 3 = 27
- 10) (7 sc, dec) × 3 = 24
- 11-17) 24. Crochet row 15 in FLO.
At the end, work a sl-st, fasten the yarn, and leave a tail for sewing. Tie in red with sl-st between rows 14 and 15.
Glaze
- 1) 6 MR
- 2) 6 inc = 12
- 3) (1 sc, inc) × 6 = 18
- 4) (2 sc, inc) × 6 = 24
- 5) (3 sc, inc) × 6 = 30
- 6) (4 sc, inc) × 6 = 36
- 7) (5 sc, inc) × 6 = 42
- 8) (6 sc, inc) × 6 = 48
- sc, 3 dc in 1, sc
- 2 sc, 2 inc dc, sc
- 2 sc, inc dc, inc trc, inc dc, sc
- 2 sc, 2 inc dc, sc
- 2 sc, 3 dc in 1, sc
- 2 sc, 2 inc dc, sc
- 2 sc, inc dc, inc trc, inc dc, sc
- 2 sc, 2 inc dc, sc
- 2 sc, 3 dc in 1, sc
- sc, 2 inc dc, sl-st, fasten the yarn and leave a tail for sewing.
Embroider sprinkles.
Buttons
Make 2 pieces: 5 sc in MR.
Assembly and Finishing
Gather the crocheted parts and assemble the gingerbread. Use the tails left for sewing and the finished-project photo as a visual guide. The instructions specify that the arms may be crocheted into the body in row 25. The pattern does not give further placement measurements.
Maker Tips
Keep stuffing gradual: The body and hat instructions say to fill as you crochet. Add stuffing in small amounts so it is easier to shape the pieces.
Check the color changes as you work: The leg instructions call for specific milky and brown yarn changes. Keep the written notes nearby while crocheting.
Use the finished photo as a guide: Since the pattern does not provide placement measurements for every part, compare the pieces with the finished image during assembly.
Final Thoughts
This gingerbread amigurumi is a cheerful project for makers who enjoy building a character from separate crocheted pieces. When yours is finished, share a photo of your handmade friend and explore more crochet patterns on the blog.